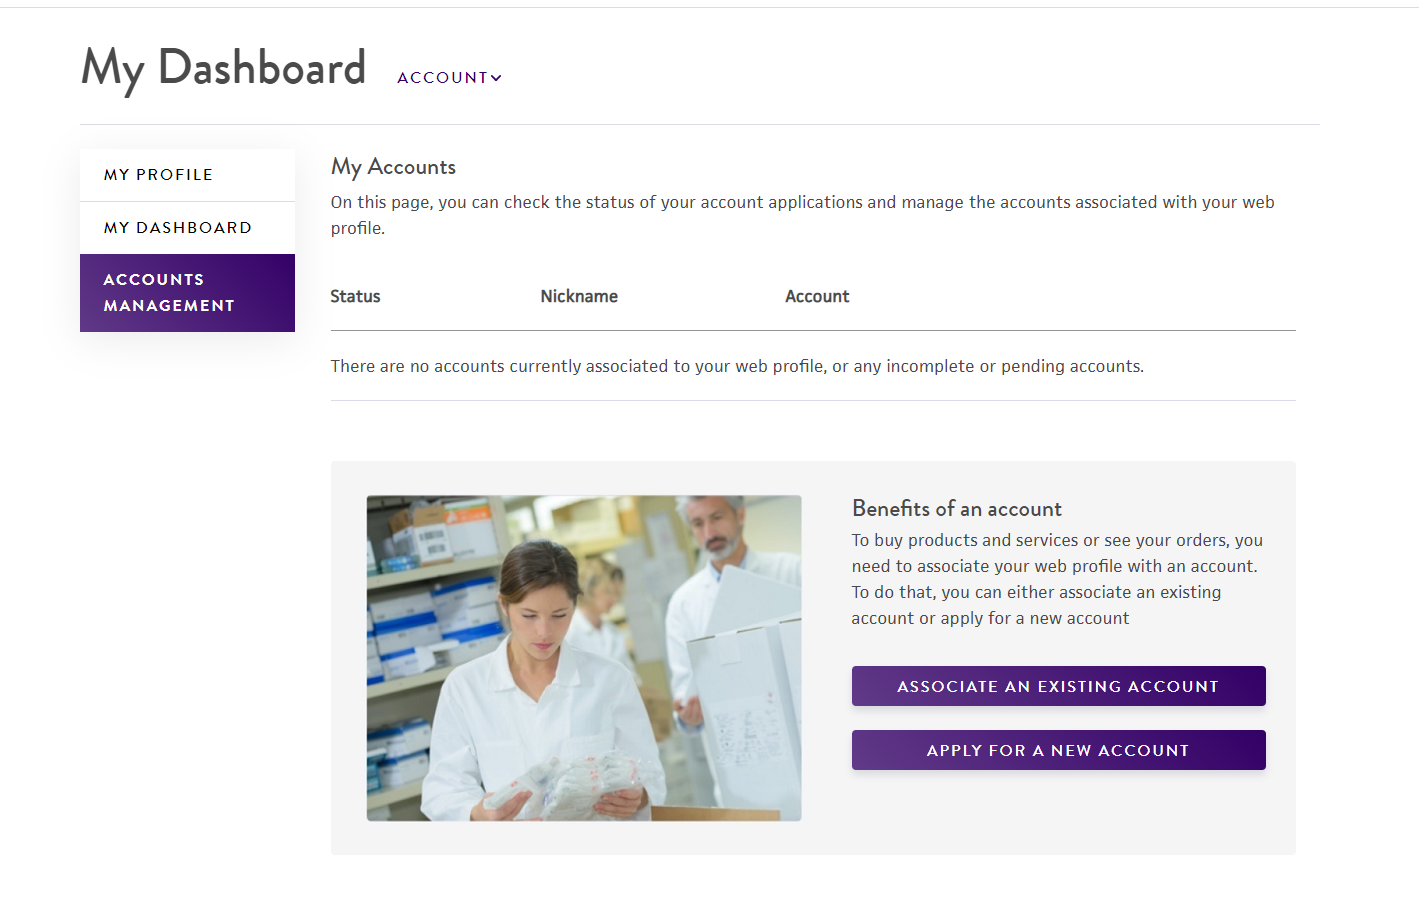
To buy products and services or see your orders, you need to associate your web profile with an account. To do that, you can either associate an existing account or apply for a new account.
Logged in user can apply for a new ATCC account by one of two ways. (You must be logged in to your profile for either option.):
1. Select the "Apply for a New Account" link in the upper right header

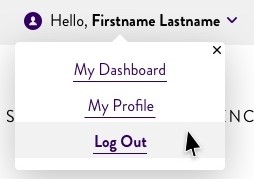
2. Select the down arrow to the right of your name in the Profile Utility > Select "My Dashboard" > Select "Accounts Management" > Select "Apply for a New Account"
These are the required steps in the Apply for an ATCC Account process that need to be completed. You must complete each section before you can proceed to the next. You are able to save your application and return to complete the application at any time. If you have any issues or questions, please contact us so we can assist.
- Organization
- Billing
- Shipping
- Biosafety Level
- End User
- Signatures
Step 1: Organization
Please complete this section with information about your organization.
If selecting nonprofit for organization designation, we will validate your nonprofit status prior to approving your application.
Required fields:
- Organization name
- Organization type
- Country or region
- Organization tax ID (such as EIN or VAT number)
- What is the designation of your organization?
Step 2: Billing
Payment Information
Please complete the following information for your account to receive invoices at this address. We suggest you verify the address with your organization’s accounts payable department.
There can be only one billing address per account, but your account may have multiple shipping addresses.
Required fields:
- Payment method preference
- Billing Address (Address 1)
- Country or region
- State or Province
- City
- Postal code
Billing Contact
Please provide information for the person in your organization who handles accounts payable so that we can contact them if we have any issues with billing.
Required fields:
- First name
- Last name
- Email address
- Phone number (no dashes)
Step 3: Shipping
Shipping Address
For each individual order placed, you'll be able to add the information for building, department, and room.
Do not use a P.O. box or residential addresses. Otherwise your account will not be approved.
Once your account is approved you can add additional shipping addresses.
Required fields:
- Organization name
- Address (If address is the same as billing address then user can check the box to have that information prefilled in)
- Country or region
- State or Province
- City
- Postal code
- Biosafety Level Selection
Required fields:
A Biosafety Level is required for each Ship To Address created under your primary account. Please select the desired biosafety level of products that you want to purchase with this account. Select "No Biosafety Level" if you are going to purchase material that does not have a biosafety level. Upon selection of a biosafety level 1, 2, or 3, you will see the applicable requirements for the biosafety level selected and must acknowledge those requirements.
- No Biosafety Level
- Biosafety Level 1
- Biosafety Level 2
- Biosafety Level 3
Step 4: Biosafety Level Acknowledgement
Biosafety Level Policy for the respective Biosafety Levels 1, 2, 3 selected in the previous step (Shipping).
(Not required for No Biosafety Level.)
Required fields:
Acknowledge the statement by checking the box
- I acknowledge that I have read, understand, and agree to the above requirements.
Step 5: End User
Primary End User
Enter information for the primary end user for this account. You can add up to two additional end users.
Required fields:
- First name
- Last name
- Address (If address is the same as shipping address then user can check the box to have that information prefilled in)
- Street
- Country or region
- State or Province
- City
- Postal code
- Email address
- Phone number (no dashes)
User can add up to three End Users or choose not to and move to the next step.
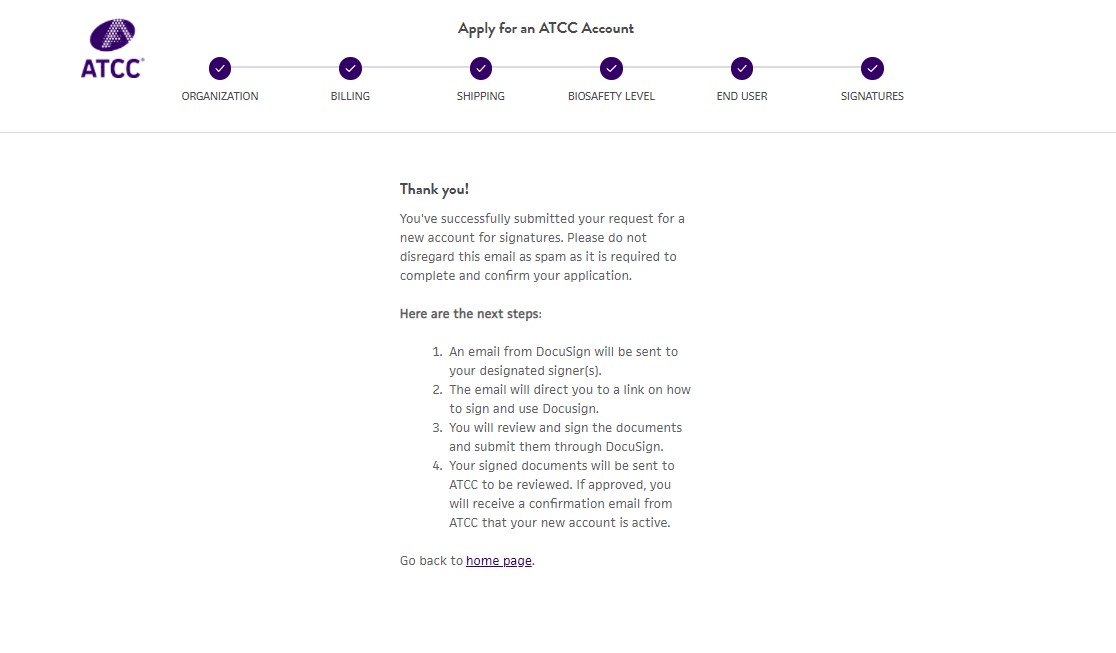
Step 6: Signatures
Signatures for new account
All individuals listed below will need to electronically sign before the completed request is sent to ATCC for review and approval.
- Biosafety Officer (Required for Biosafety Level 1, 2, 3)
This person oversees your organization's environmental and biological safety processes. They will sign the documentation acknowledging biosafety level compliance.
*for Secondary Schools (Middle or High School):
This person oversees your organization's environmental and biological safety processes. This could be a teacher or principal. They will sign the documentation acknowledging biosafety level compliance as well as a supplemental form.
- Legal Signatory (Required for No Biosafety Level, Biosafety Level 1, 2, 3)
*if a MTA exists for this organization with the same TIN, this will not display
This person has the full authority to execute legally binding agreements on behalf of your organization. For example, this person may be a technology transfer officer, legal officer, or corporate officer. They will sign the material transfer agreement.
* for Secondary Schools (Middle or High School):
This person has the full authority to execute legally binding agreements on behalf of your organization. This could be your principal or head of school.
- Applicant (Required for No Biosafety Level, Biosafety Level 1, 2, 3)
The applicant is the person who is making the request and who will sign the documentation. If there are any issues during the review, Customer Care will contact the applicant.
Required fields:
- First name
- Last name
- Contact’s email
You will have the option to select "Save and Finish Later" at each step and continue later by going to My Dashboard > Accounts Management.
After submitting the application, you will see a confirmation page advising the next steps.
You can check the status of your application by going to My Dashboard > Accounts Management.